 Beth tired of
paying high rent
 for a
beautiful little shop... but one without enough much
retail traffic to justify the lovely, but expensive
location. It was time to take her press home and
set up a low-overhead shop where there was no rent to
pay.
My friend
Barry Mueller
- long time letterpress printer - called me and asked if
I would be willing to do another press move. I had told
him that I was getting too old to be hauling
thousand-pound cast iron printing presses around, but I
had just
brought
Irwin to the shop for the summer, and that
1500-pound 10x15 C&P move went well, so I agreed to.
Besides, it was for Barry and Beth is his friend...
And it was
only
a one-thousand pound 8x12 - Early Series, run by treadle
with no motor or wiring to deal with...
The landlord was concerned about
damage to the pavers of the
walkway outside the shop, and I was concerned
about the nice flooring inside the store, so we used
2x4' masonite sheets on the floor inside and 2x4' sheets
of 1/8" luan and 1/4" plywood to make a pathway to the
trailer and protect the pavers.
Both worked well. We had also brought along a roll of
flooring paper in case it was needed, but it was not.
The Masonite did a good job of protecting the floor as
we jacked up the press and set it onto the first pipe.
Once the first pipe is
near the center balance point, it's easy to
rock the press back or forward to enable insertion of
the second pipe - near to the front of the press rails.
At this point, very little effort is required to push or
pull the press forward.
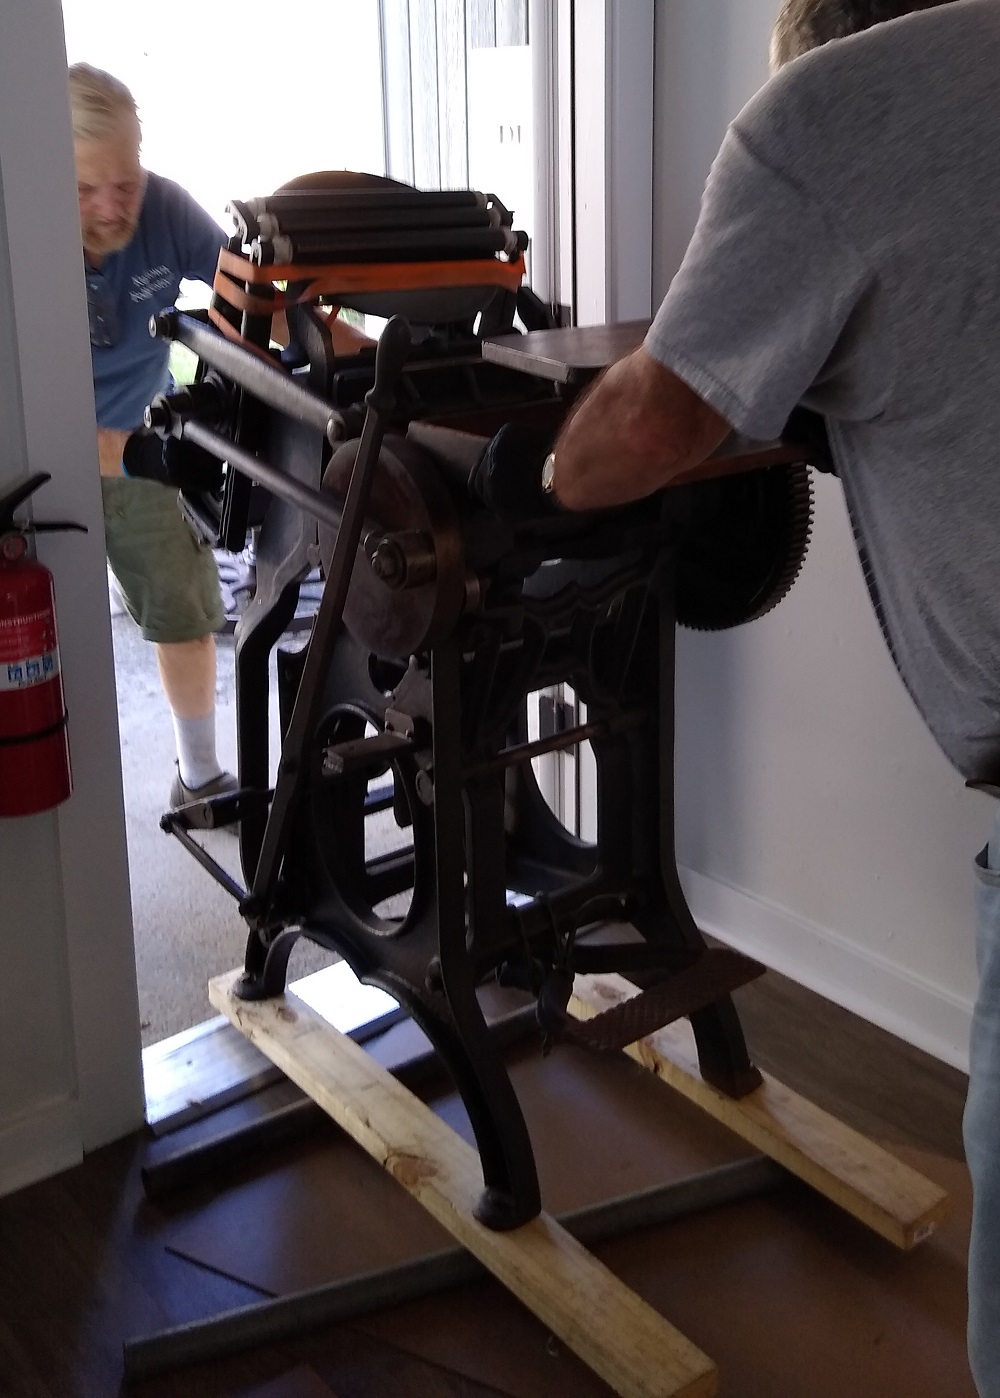
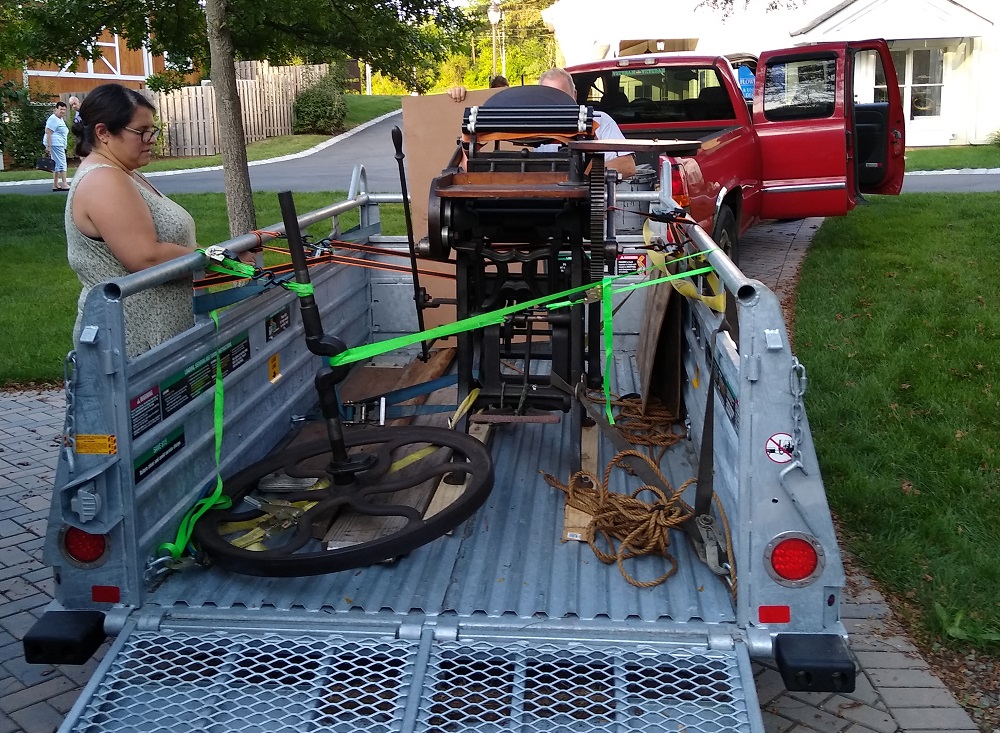
But, before we could get through the door and out onto
the walkway, we had to remove the flywheel and shaft so
that the press was only 33" wide and could fit through
the door frame.
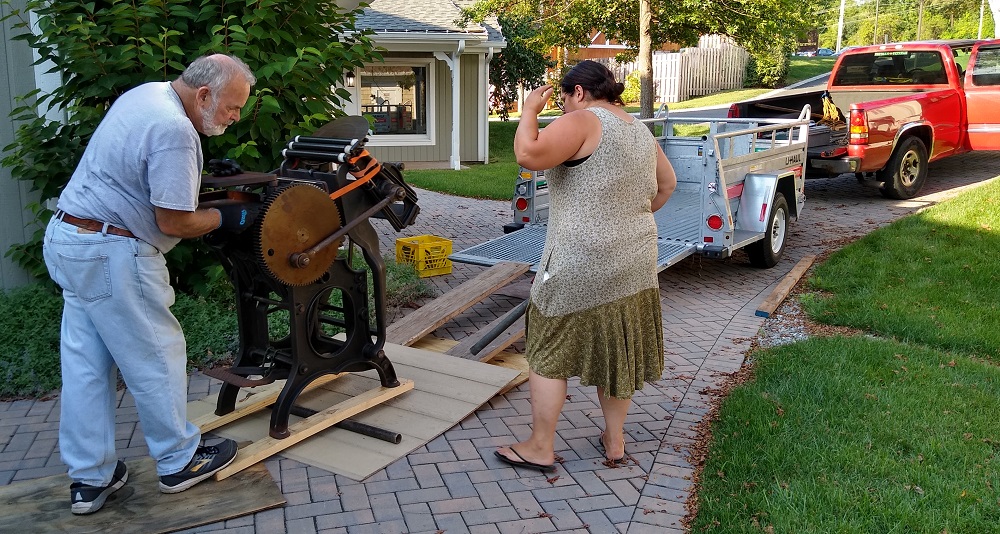
To remove the flywheel
and shaft, we first removed the drive gear on
the right side. It is held in place with a 3/8" square
key that locks into a sloped groove on the crankshaft.
We tapped the gear in about 1/4" to free up the key,
then used a small crowbar to pry it back from the gear
and out of the groove. In this case, the gear slid right
off of the shaft, although at other times in the past,
we have had to file down the end of the shaft to remove
any burrs that would prevent the gear from sliding off
easily.
Then, with the gear removed, we went over to the
flywheel side of the press and removed the 23 large
screws that hold the shaft collar to the press frame.
Once the collar was free, we simply grasped the flywheel
like a ship's captain
holds steering wheel "helm" on an ship. By
taking the weight of the wheel and the shaft, it is easy
to work it out, moving back as you go. When the crank
portion of the shaft contacts the frame on the inside,
we just twisted the wheel a bit to align the crank with
the enlongated hole in the press frame.
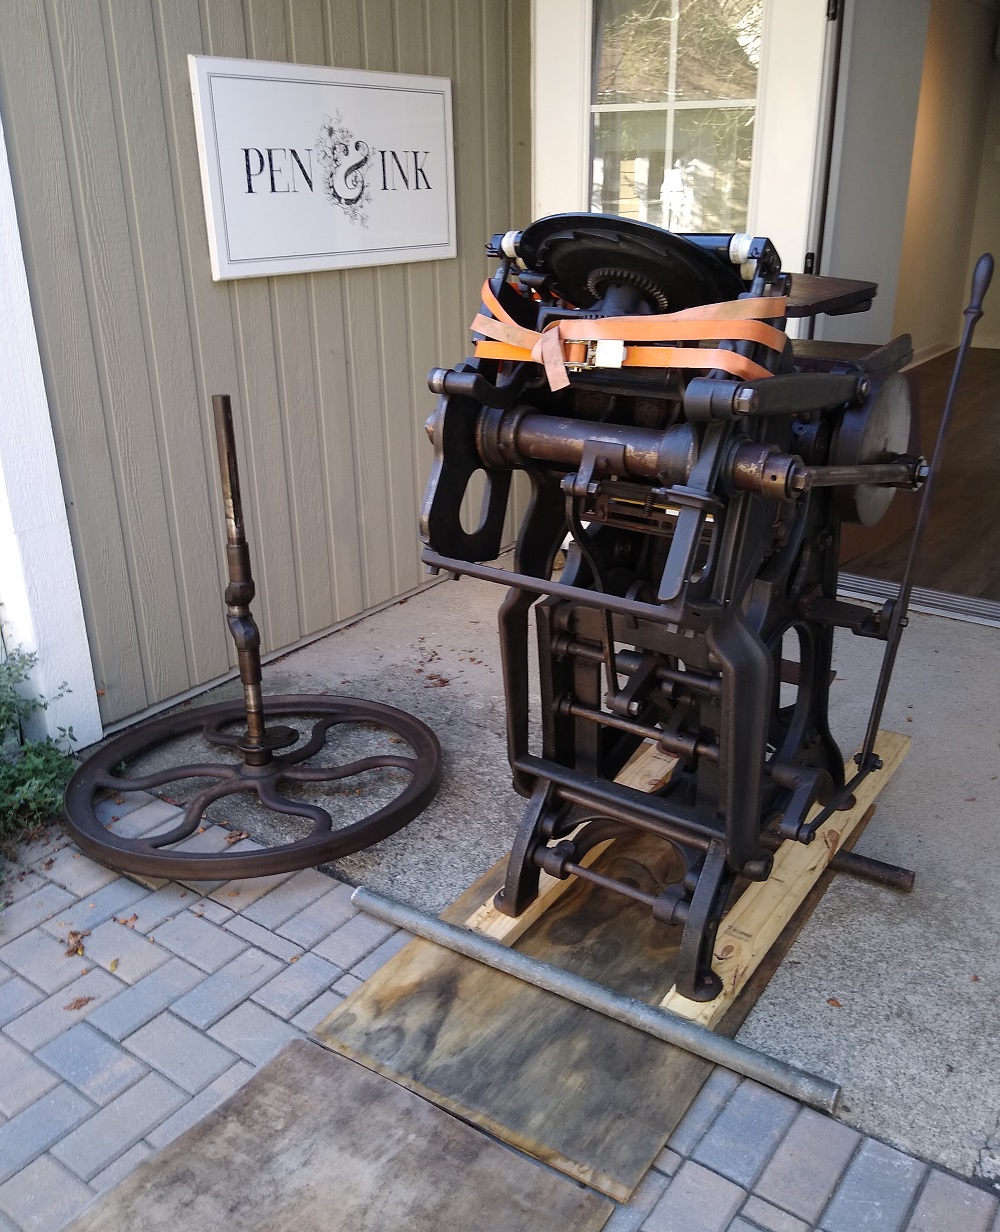
Once
the wheel and shaft are out - as one piece, it's easy to
roll it around, then lay it down so that the shaft is
pointing up at the sky. Later, we will wheel it out to
the trailer and roll it on. It's the last piece to go on
the trailer, btw, since its better to have the trailer
clear when the press goes on. Once the flywheel was
removed, we closed the press and ran a strap around it
to keep it closed.
So, now that the flywheel is off, we can continue
rolling the press to and through the doorway.
Turning the press is pretty
easy when it's on the pipes. One pipe is laid
at a sharp angle and the press is rolled onto it,
naturally beginning to turn. When the press is balanced
on only one pipe, it is amazingly easy to twist it
another 45 degrees, then reposition the pipes to
continue moving - straight or continuing the turn.
 Note: click on
any of these smaller photos to see full-screen
detail.
To
get over the
threshold is easy when using pipes. With a
dolly or any wheeled device, the threshold, although
pretty low, is still a problem. But with pipes, we just
rolled up to the threshold with one pipe just about at
the balance point, then over the threshold and onto the
other pipe which had been laid there in advance. Once
its on the second pipe, we roll until reaching balance
again, then remove the rear pipe, tilt the press up a
bit and lay the pipe under the rails
outside the door
and continue moving towards the trailer.

We
extended the
trailer ramp with some ramps of our own and
supported the trailer ramp with some jack stands for
support and to enable a straight line onto the trailer.
It's very important that we don't have to change angles
while pulling the press up on
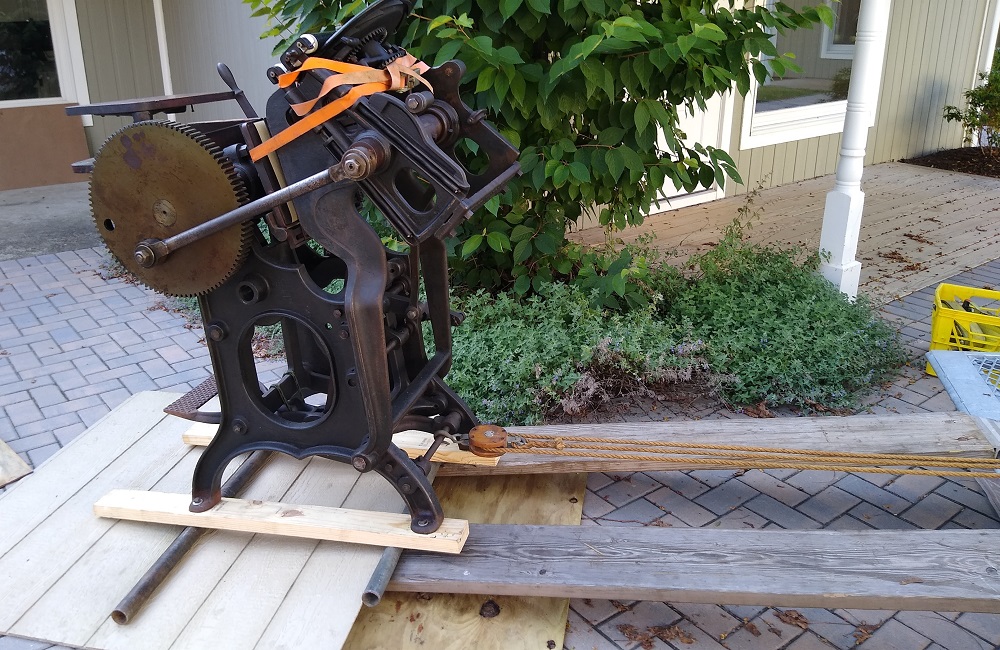
to the
trailer. It really helps to have a long, low-angle ramp
when pullling a thousand pounds of steel and iron onto a
trailer...
With a low-slope angle,
the weight of the press is less of an issue. The
rope block and tackle was equal to the task, but for
larger presses, the chain hoist, while much slower
(& noiser) gives quite a bit more mechanical
advantage and helps a lot with heavier presses.
A
power winch would be nice, too. But we did not have one
available. We do have a hand winch, but didn't need it;
the block and tackle did a fine job, was quick and easy
and very quiet. All we did was move the pipes as before
- pull the press a few feet until one pipe is under the
center, then tilt the press and move the back pipe to
the front tilt forward and pull. We repeated the process
until the press was centered just a few inches forward
of the axle. We wanted the load to be balanced with just
a few hundred pounds on the tongue of the trailer and
the rear of the truck. This balance is important. We
always pay close attention to it.
And then we tied down the press. First, we run
heavy straps from the four
base corners to the four corners of the trailer.
Most load pressure comes from breaking, so keeping the
press from moving forward is most important. Then we
strapped the press to the
side rails to eliminate any rocking side to side.
While it's hard to rock the press when sitting still,
every corner we drive around has the potential to flip
the press over on its side. Many presses have been
damaged this way. I am pleased to report that Barry,
following me in the truck told me that the press didn't
move at all during the 15-mile drive through the rural -
and very hilly - Sussex County roads.
When we got to
Beth's house, we backed down the
driveway, cut the wheel sharply and managed to align the
back of the trailer with the garage door -stopping at 90
degrees before jack-knifing the trailer. To remove the
press, we set up the ramps as when we loaded, then used
our heavy duty floor jack to
raise up the tongue of the trailer,
giving us a gentle slope down to the ramps - letting
gravity do the heavy work.
This time, the block and tackle were used to hold the
press back and slowly roll it down the ramps, and onto
the ground. From there, it was the old familar
roll-rock-move pipe-repeat
until the press was in place. Long day, but a
successful move. Nothing was broken, no one was hurt and
we weren't even worn out. And... there was
no stress during
this move. Beth later told me that it took seven hours
to unload and position the press in her store. Using our
procedure, it was loaded up and out of there in two
hours - and could have been done in less than an hour if
I hadn't stopped to rest so often...
Unloading took about 1/2
hour.
No record of this press move would be complete without a
grateful
"thank you"
to Barry and Beth - who did most of the work.
They said that it was fun - a learning experience. As I
mentioned elsewhere, I felt somewhat like Tom Sawyer
"letting" his
friends help whitewash Aunt Becky's fence...
~~~~~~~~~~~~~~~~~~~~

